If you ever wish there was an easy way to hide the embarrassing tagged photos of yourself on Instagram that friends and family keep posting (or those fake accounts that randomly tag you in those “You Won $1000” posts.), there is good news, it is possible.
While it may be difficult to find on your own, this step-by-step guide will show you exactly how to take control of your Instagram appearance in no time.
Control your Instagram tagging:
P.s. These methods work for iPhone, Android, and PC/Desktop.

How To Hide Tagged Photos On Instagram
If you’d like to remove an individual post from appearing in your tagged posts section on your Instagram profile, follow these steps.
Step 1: Open Your Instagram App On Your Phone
The first step is to open your app on your device.

Step 2: Go To Your Profile
Navigate to your Instagram profile. You can do that by tapping on your profile photo in the bottom right corner of your Instagram home page.

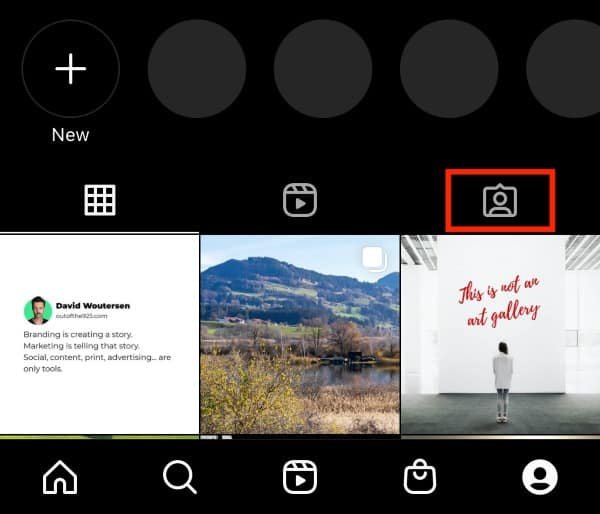
Step 3: Go To The Tagged Photos Section
Select the tagged icon on your profile page.
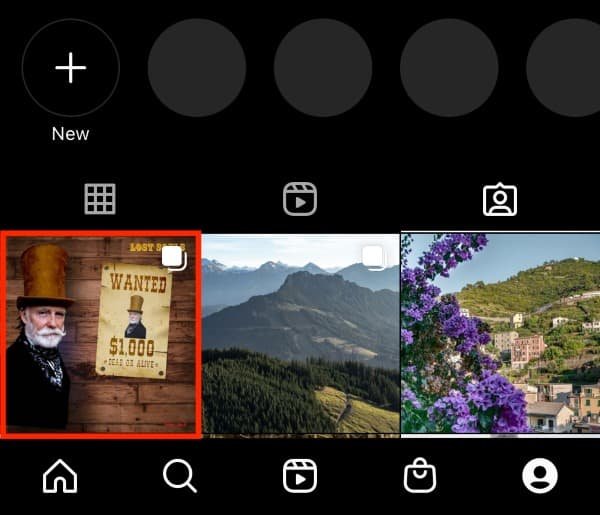
Step 4: Tap On The Picture
Once you get to the tagged photos section, tap on the photo you want to hide from your profile.
Step 5: Tap On Your Username
If you tap on your picture once again, you’ll see all the tagged users on that picture. Tap on your username.

Step 6: Tap “Hide From My Profile”
And finally, tap on the option “hide from my profile” to get rid of it.

How To Hide Multiple Tagged Posts At Once
If there are a lot of posts you’ve been tagged in that you want to hide, the process is, thankfully, a lot easier than having to hide each of them individually.
Here are the steps to follow to hide multiple tagged posts at once.
Step 1: Open Your Instagram App On Your Phone
Navigate to your Instagram profile. You can do that by tapping on your profile photo in the bottom right corner of your Instagram home page.

Step 2: Go To Your Profile
Navigate to your profile. To do that, you tap on your profile photo on the bottom right-hand corner of your Instagram home page.

Step 3: Tap The Three-Lined Icon In The Top Right
After that, tap the three horizontal lines icon (hamburger menu) in the upper right-hand corner to get to your settings.

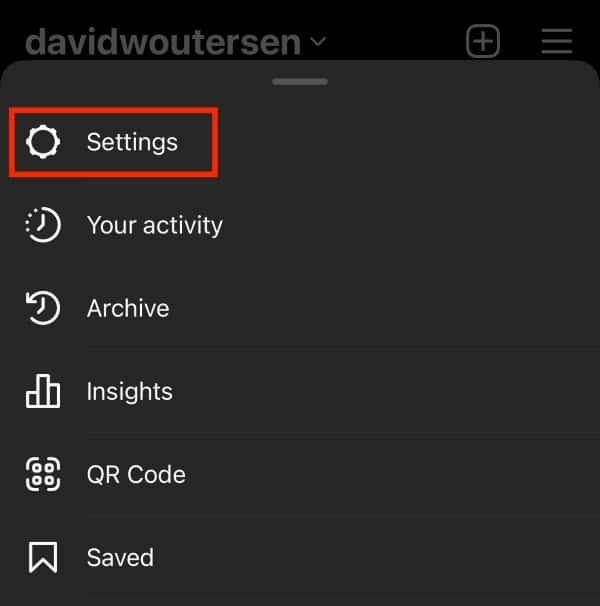
Step 4: Select Settings
Select “Settings” to access your profile and account settings.
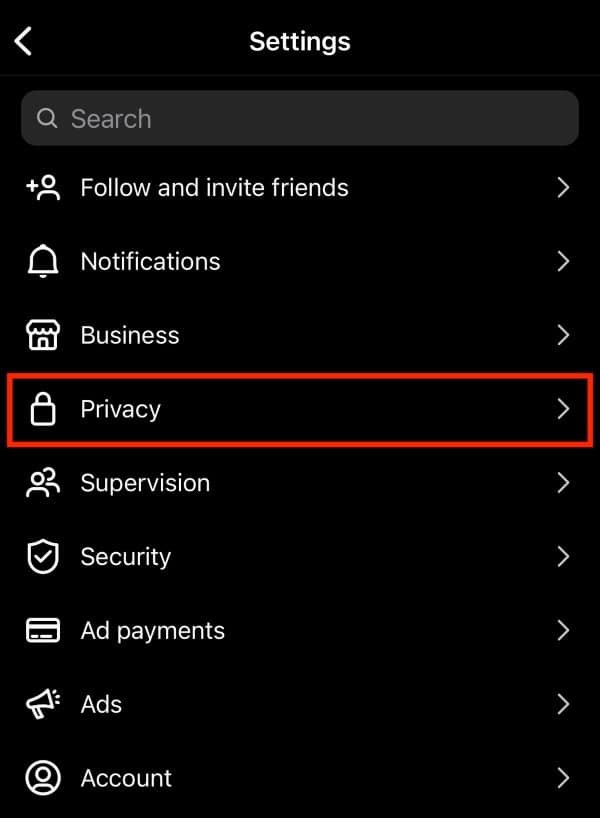
Step 5: Go To Privacy
In the settings menu, tap on “Privacy.”
Step 6: Select “Posts”
Now tap on the option “Posts.”
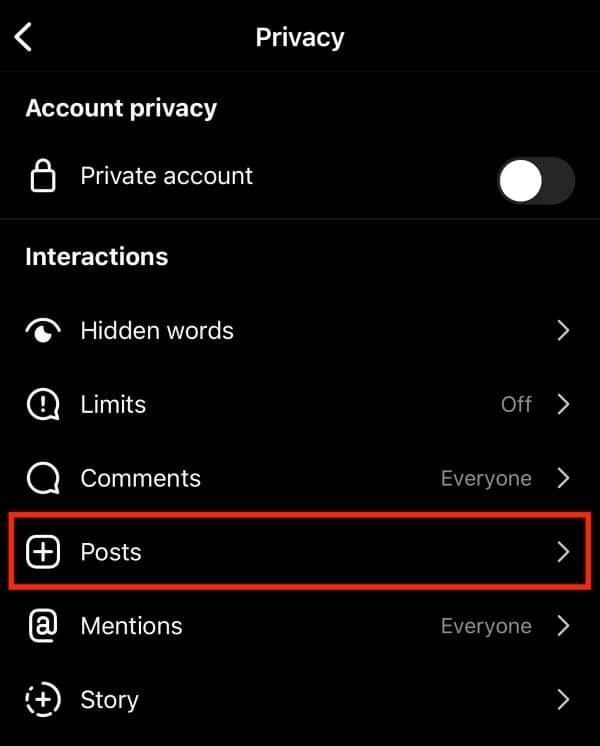
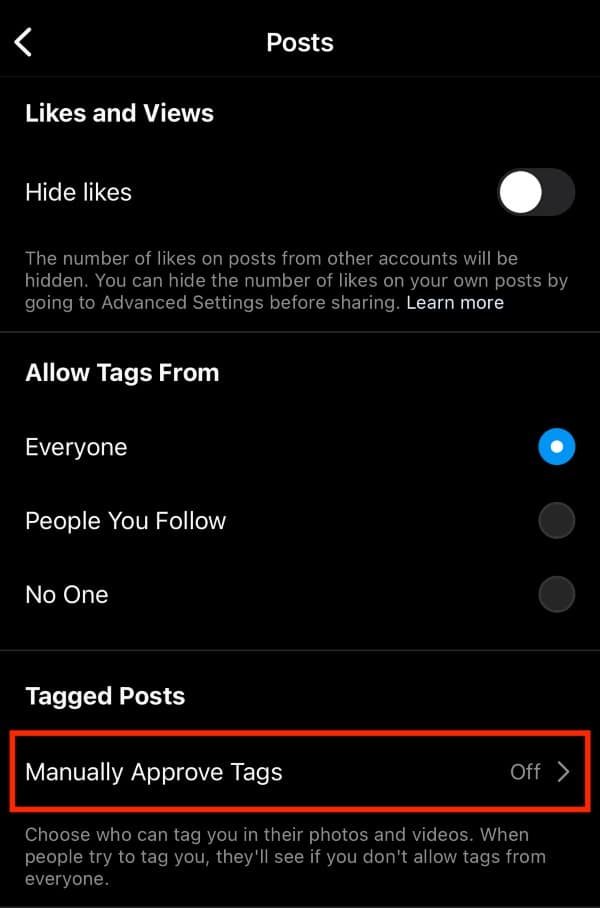
Step 7: Go To “Tagged Posts”
Under the section “Tagged Posts,” you need to tap on “Manually Approve Tags.”
Step 8: Select All The Posts You Want To Hide
Here you’ll see all the pictures you’ve been tagged in. Select the “Edit” option to the right of “Tagged posts,” and then select all of the posts you are tagged in that you want to hide.
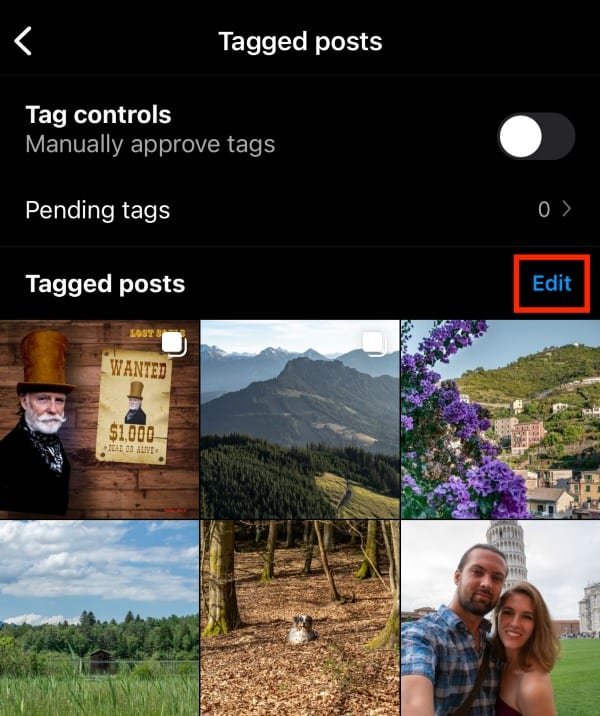
Once you have them all selected, tap the hide option.

How To Turn Off Auto-Tagging On Instagram
If you don’t want to hide every picture you get tagged in the future and want your account to be tag-proof, here’s how you can do that.
Step 1: Open Your Instagram App On Your Phone
The first step is to open your app on your device.

Step 2: Go To Your Profile
Navigate to your Instagram profile. You can do that by tapping on your profile photo in the bottom right corner of your Instagram home page.

Step 3: Tap The Three-Lined Icon In The Top Right
After that, tap the three horizontal lines icon (hamburger menu) in the upper right-hand corner to get to your settings.

Step 4: Select Settings
Select “Settings” to access your profile and account settings.

Step 5: Go To Privacy
In the settings menu, tap on “Privacy.”

Step 6: Select “Posts”
Now tap on the option “Posts.”

Step 7: Go To “Tagged Posts”
Under the section “Tagged Posts,” you need to tap on “Manually Approve Tags.”

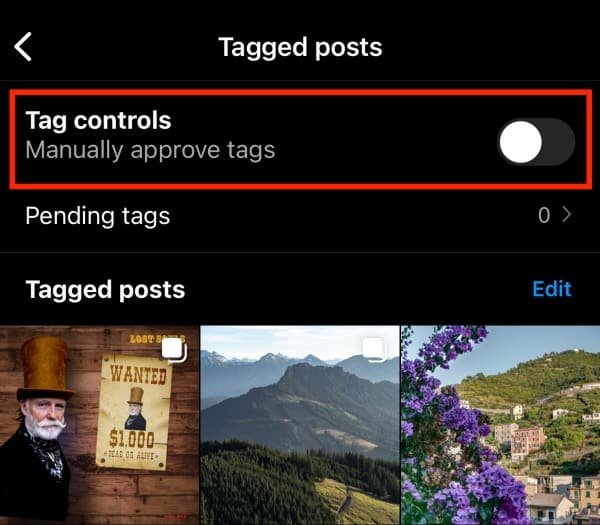
Step 8: Tap On Manually Approve Tags
The final step is to switch “Manually Approve Tags” on, and you’ll get a notification of permission when someone tags you on a picture.
As you can see, this feature is essential whether you use it for personal or business purposes.
And if you want to take control of your privacy, you have to take control of the posts you’re tagged in.